Auth0
This page documents how to configure an Auth0 application for use with Pomerium. It assumes you have already installed Pomerium.
While we do our best to keep our documentation up to date, changes to third-party systems are outside our control. Refer to Applications in Auth0 from Auth0's docs as needed, or let us know if we need to re-visit this page.
Create an Auth0 Application
-
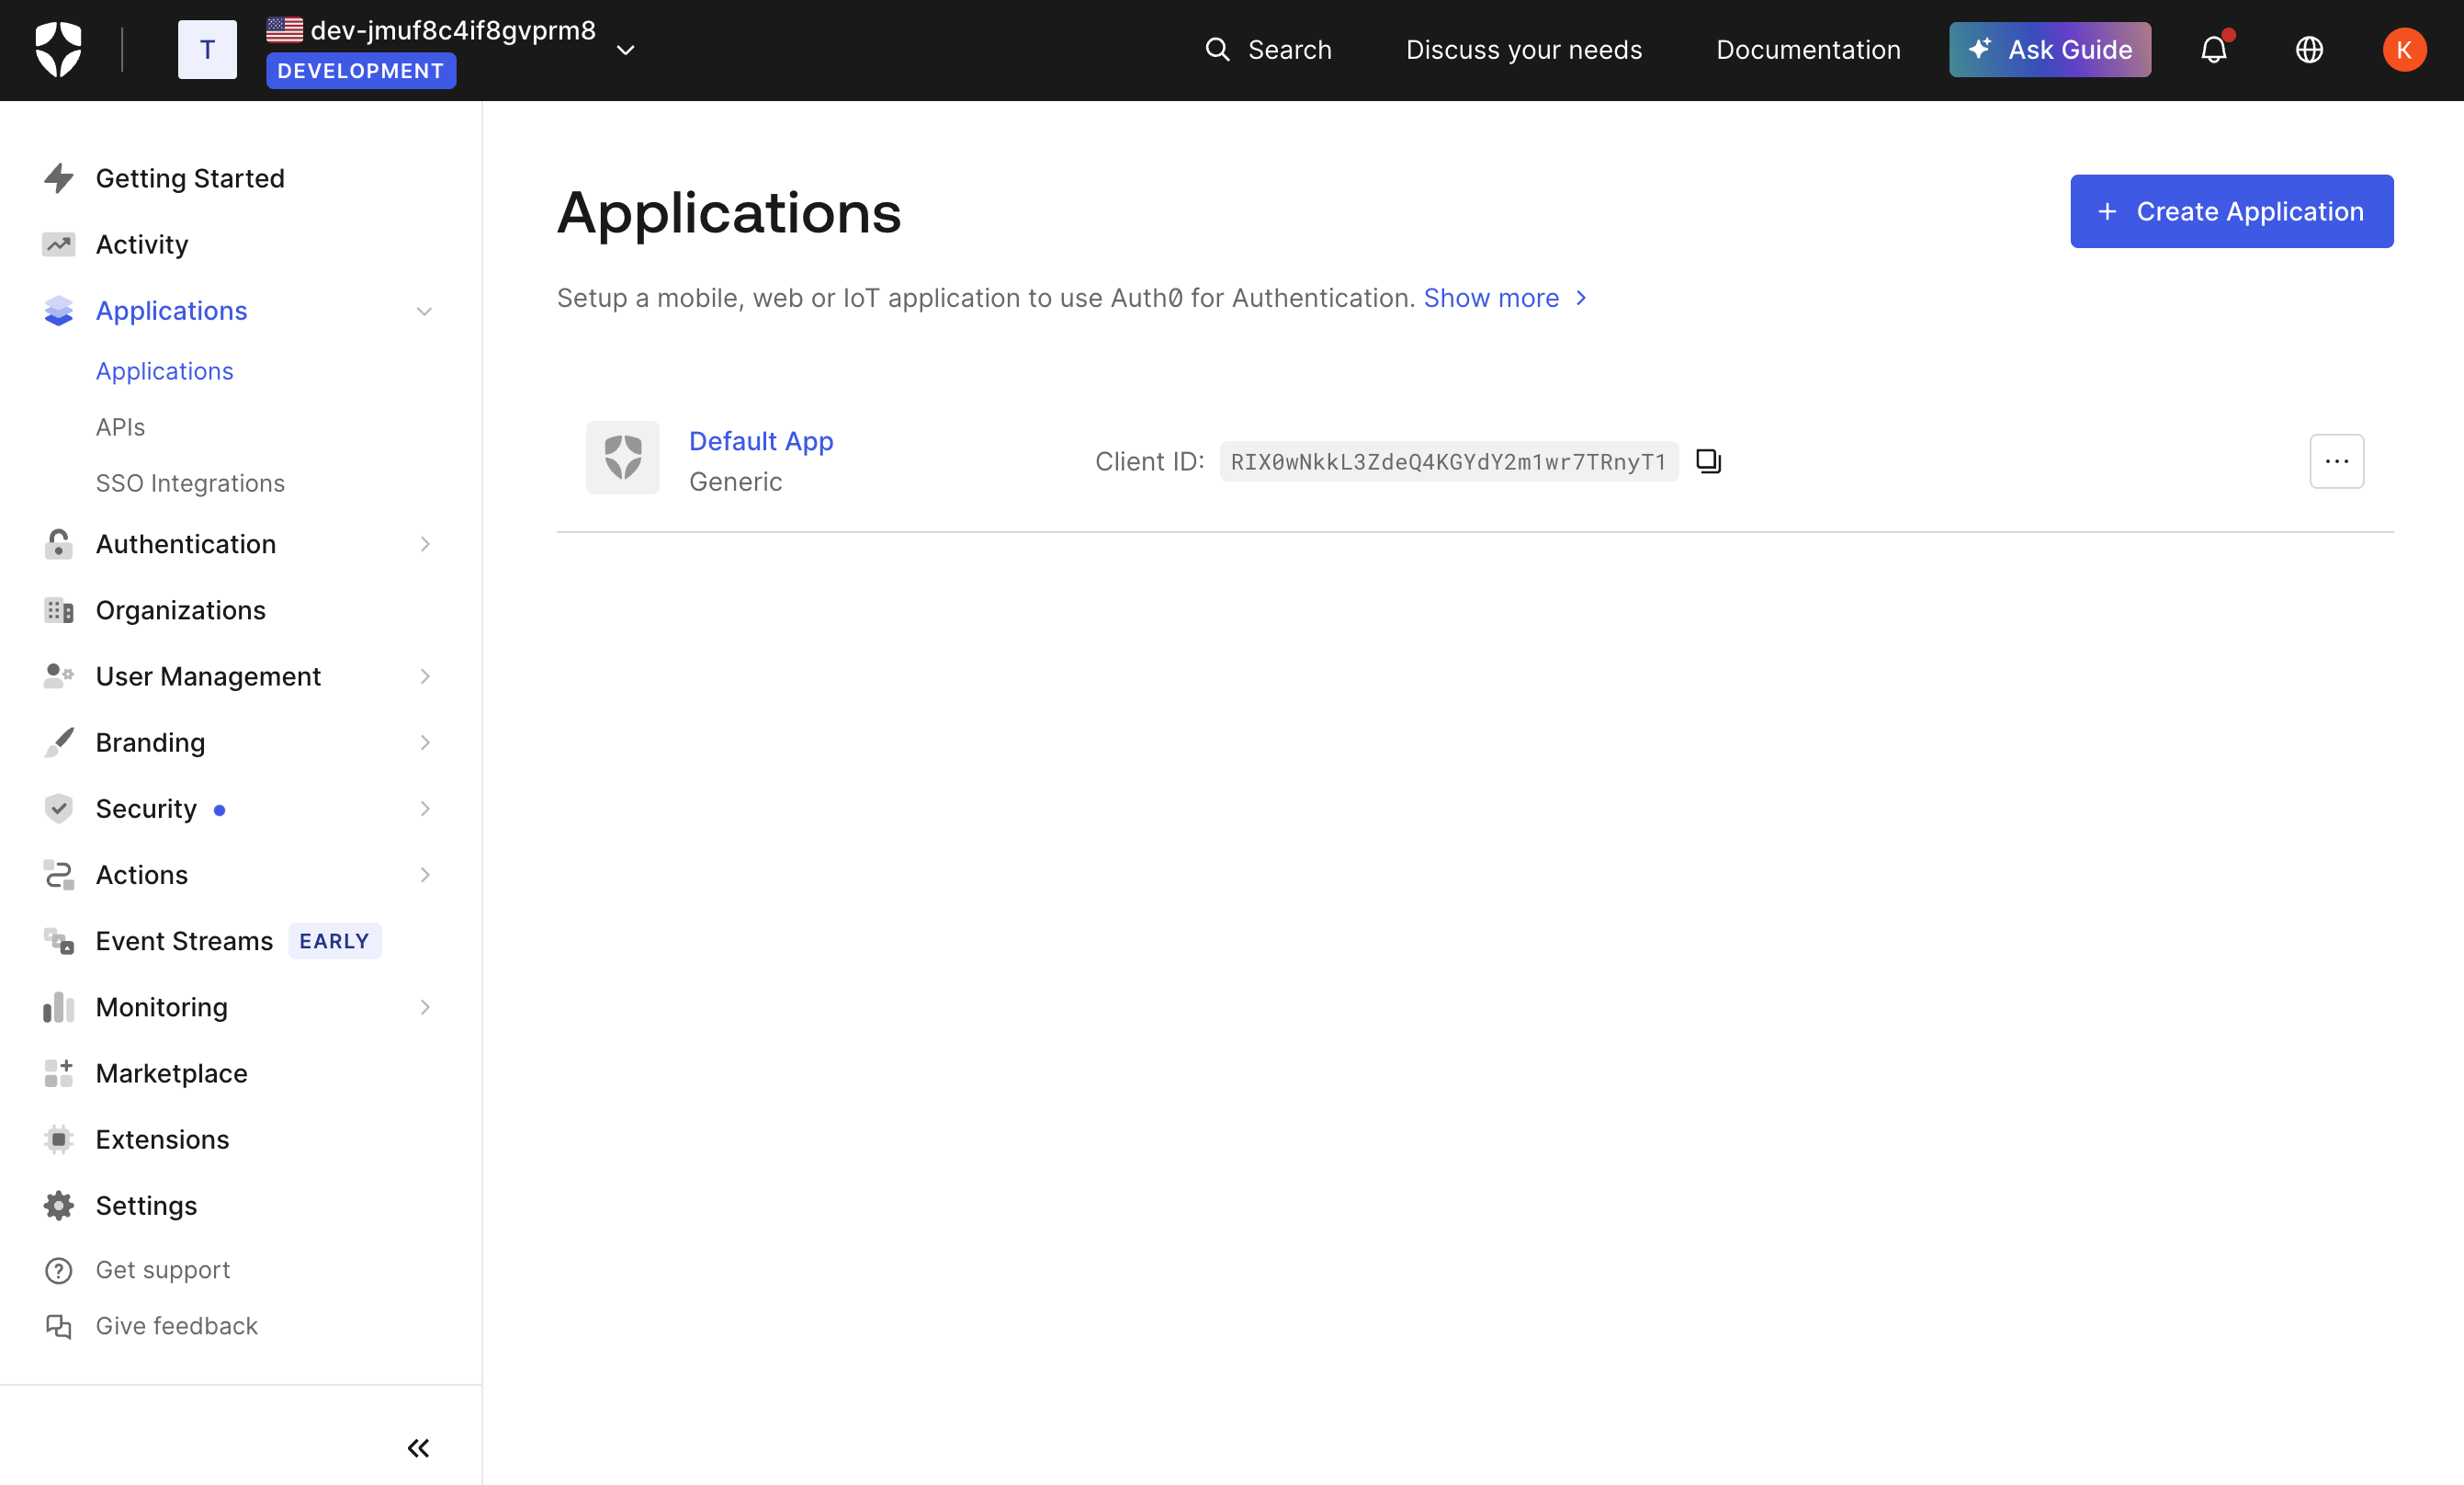
Log in to your Auth0 account and head to your dashboard. Select Applications → Applications on the left menu. On the Applications page, click the Create Application button.
-
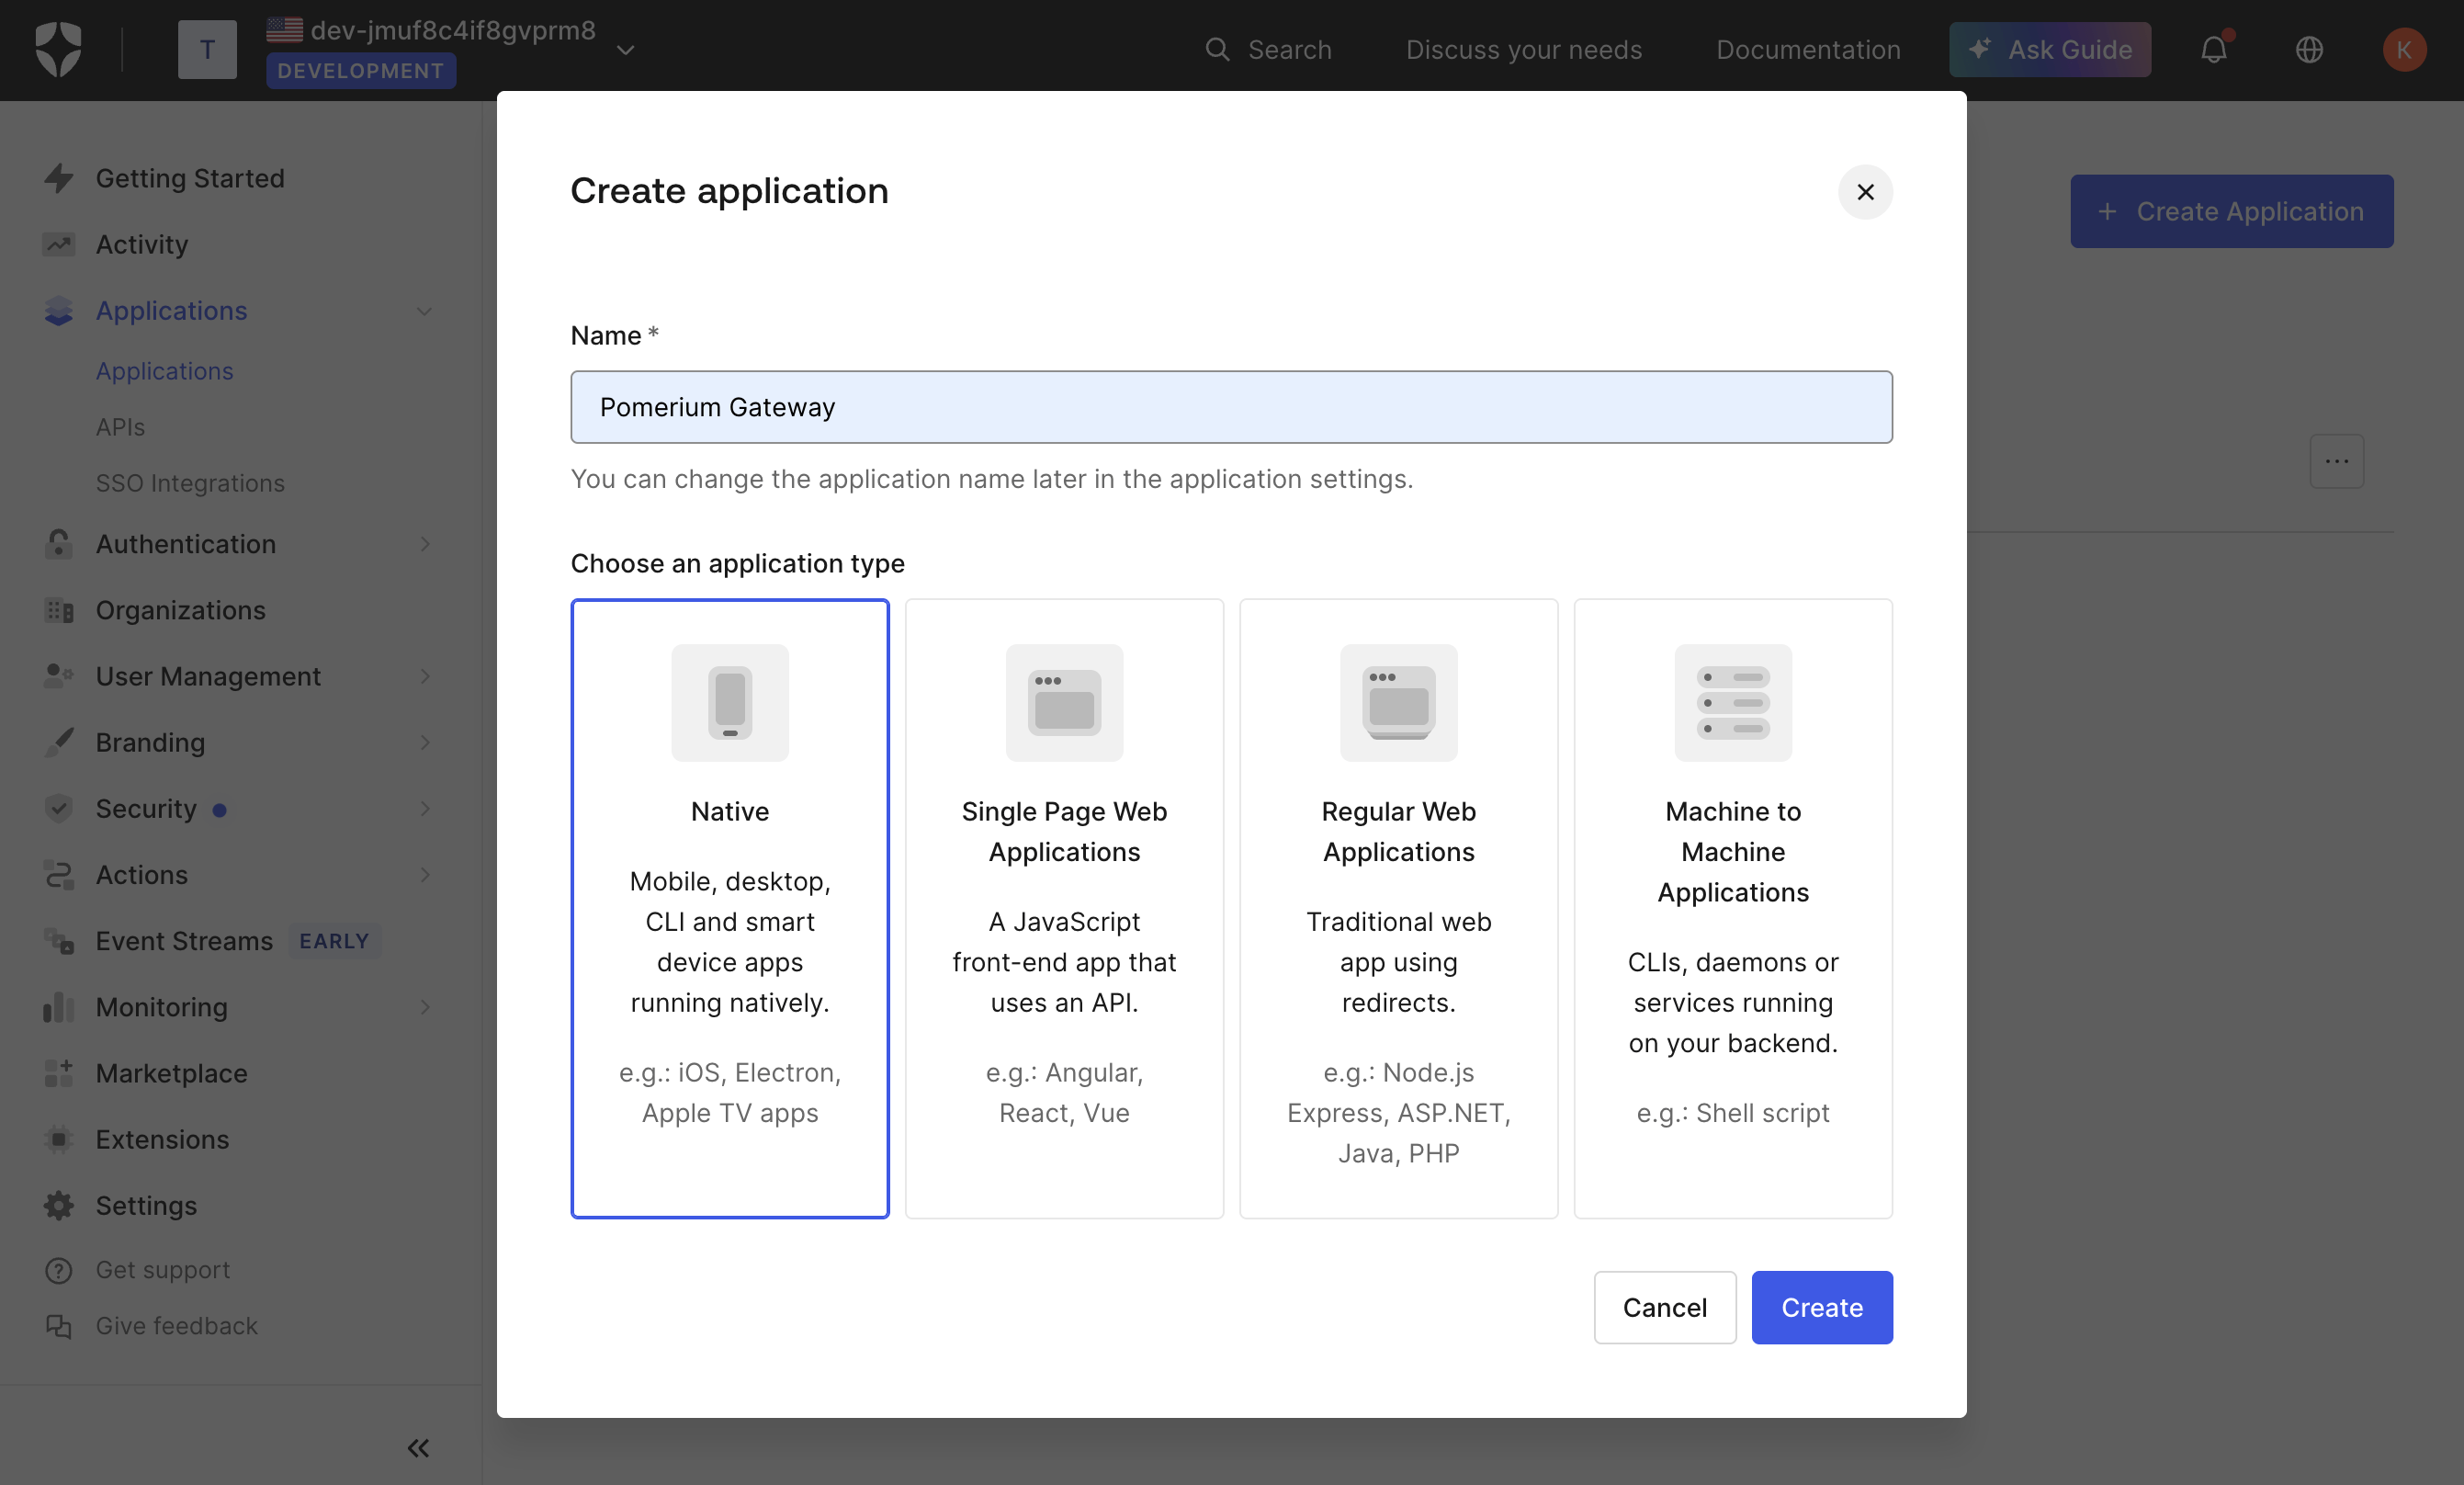
On the Create New Application page, name your application and select the type Native, then click Create. This is the application that your users will log in to.
-
Switch to the Settings tab, and note the Domain, Client ID, and Client Secret values. We'll need these later to configure Pomerium.
-
Provide the following information for your application settings:
Field Description Name The name of your application. Application Login URI Authenticate Service URL (e.g. https://auth.example.com)Allowed Callback URLs Redirect URL (e.g. https://auth.example.com/oauth2/callback).Allowed Logout URLs Sign Out URL (e.g. https://auth.example.com/.pomerium/signed_out). -
In pomerium versions 0.31.X and below, if you want to use Pomerium's native SSH access: scroll down to Advanced Settings near the bottom of the page, then select the Grant Types tab. Make sure the Device Code box is checked:
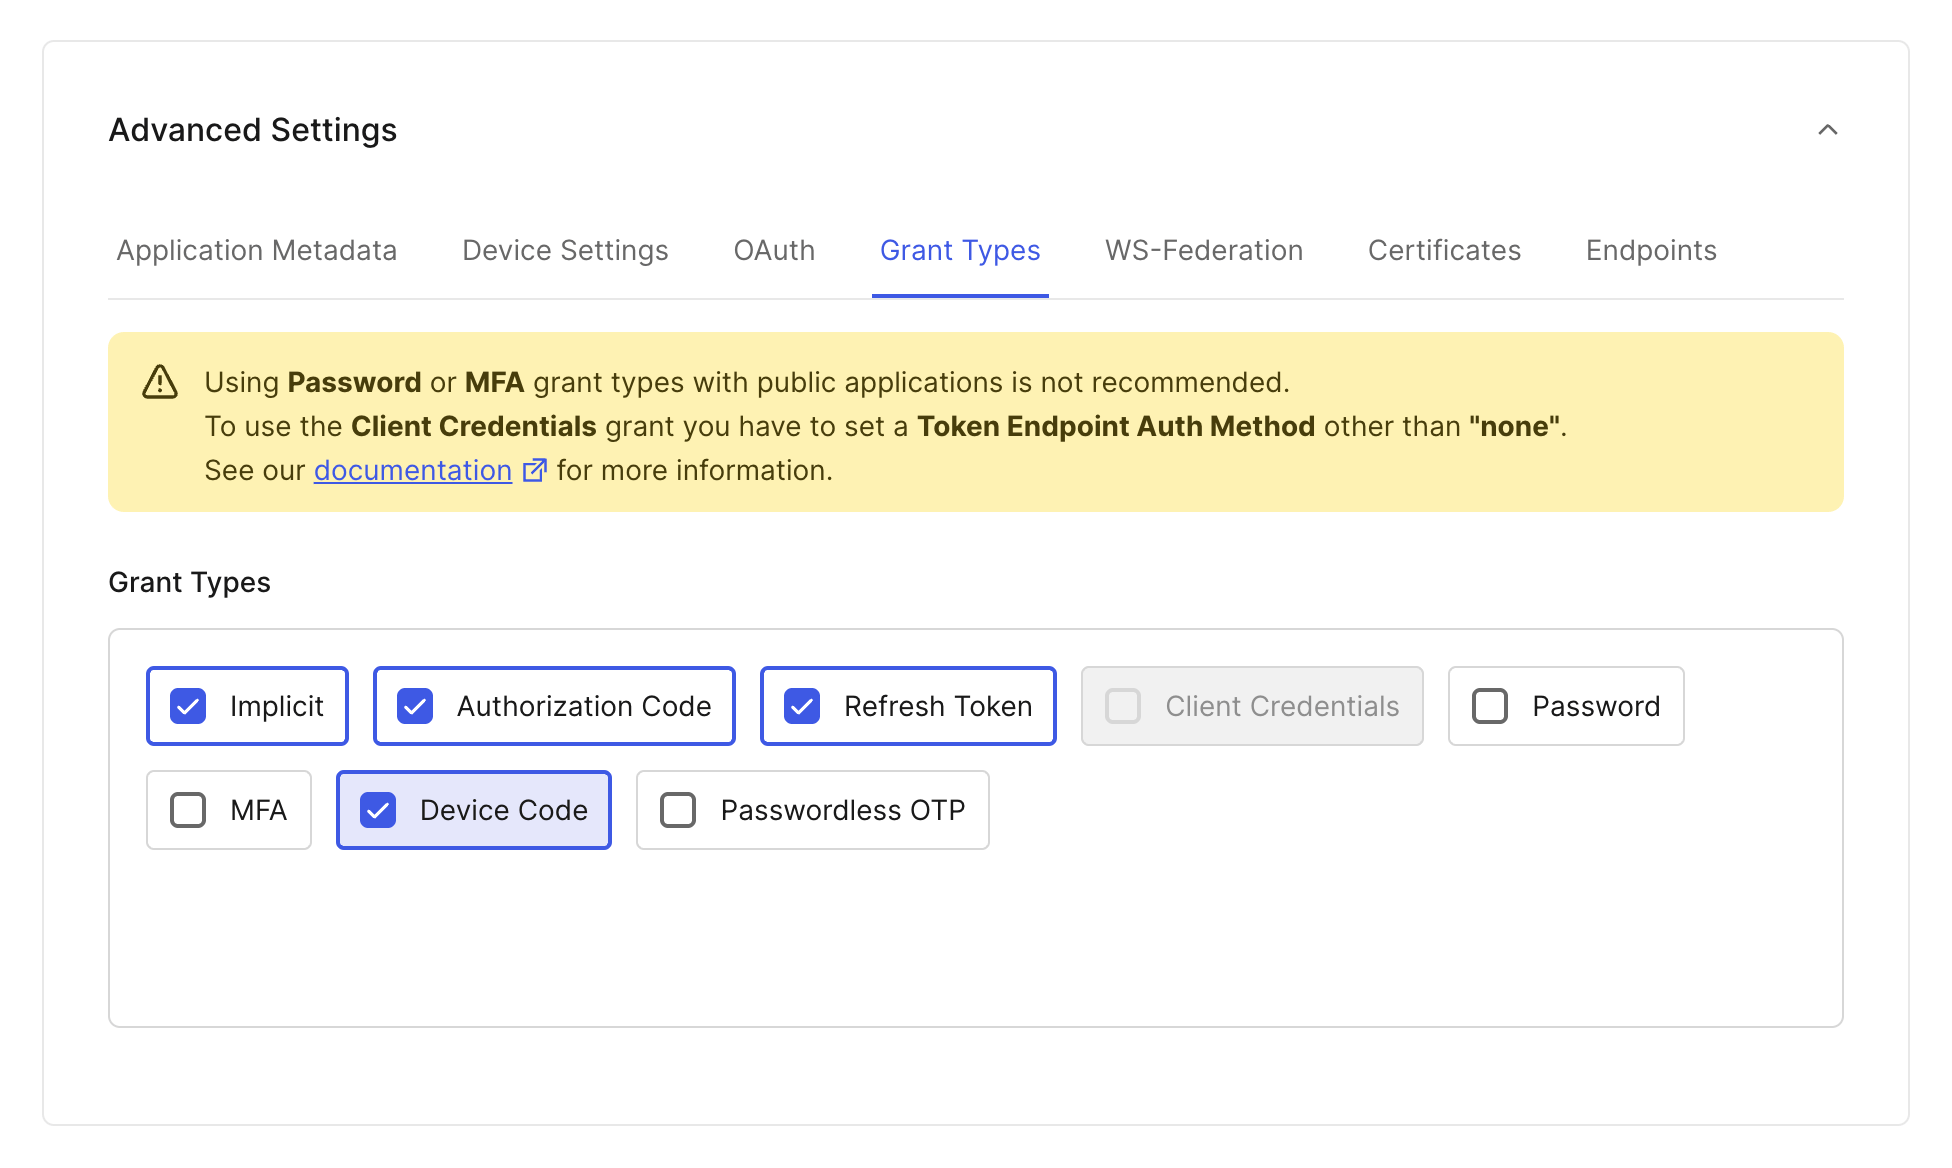
The device code support is not needed in 0.32.0 and above.
- Click Save at the bottom of the page when you're done.
Configure Pomerium
You can now configure Pomerium with the identity provider settings retrieved in the previous steps. Your config.yaml keys or environmental variables should look something like this.
- Config file keys
- Environment Variables
idp_provider: 'auth0'
idp_provider_url: 'https://awesome-company.auth0.com'
idp_client_id: 'REPLACE_ME' # from the web application
idp_client_secret: 'REPLACE_ME' # from the web application
IDP_PROVIDER="auth0"
IDP_PROVIDER_URL="https://awesome-company.auth0.com"
IDP_CLIENT_ID="REPLACE_ME" # from the web application
IDP_CLIENT_SECRET="REPLACE_ME" # from the web application
Remember to prepend the Auth0 Domain with https:// to get the provider URL.
Groups
- Custom Claim (Open Source)
- Directory Sync (Enterprise)
Custom Claim
To authorize users based on their group membership (roles in Auth0), a claim can be added to the identity token with a login action.
-
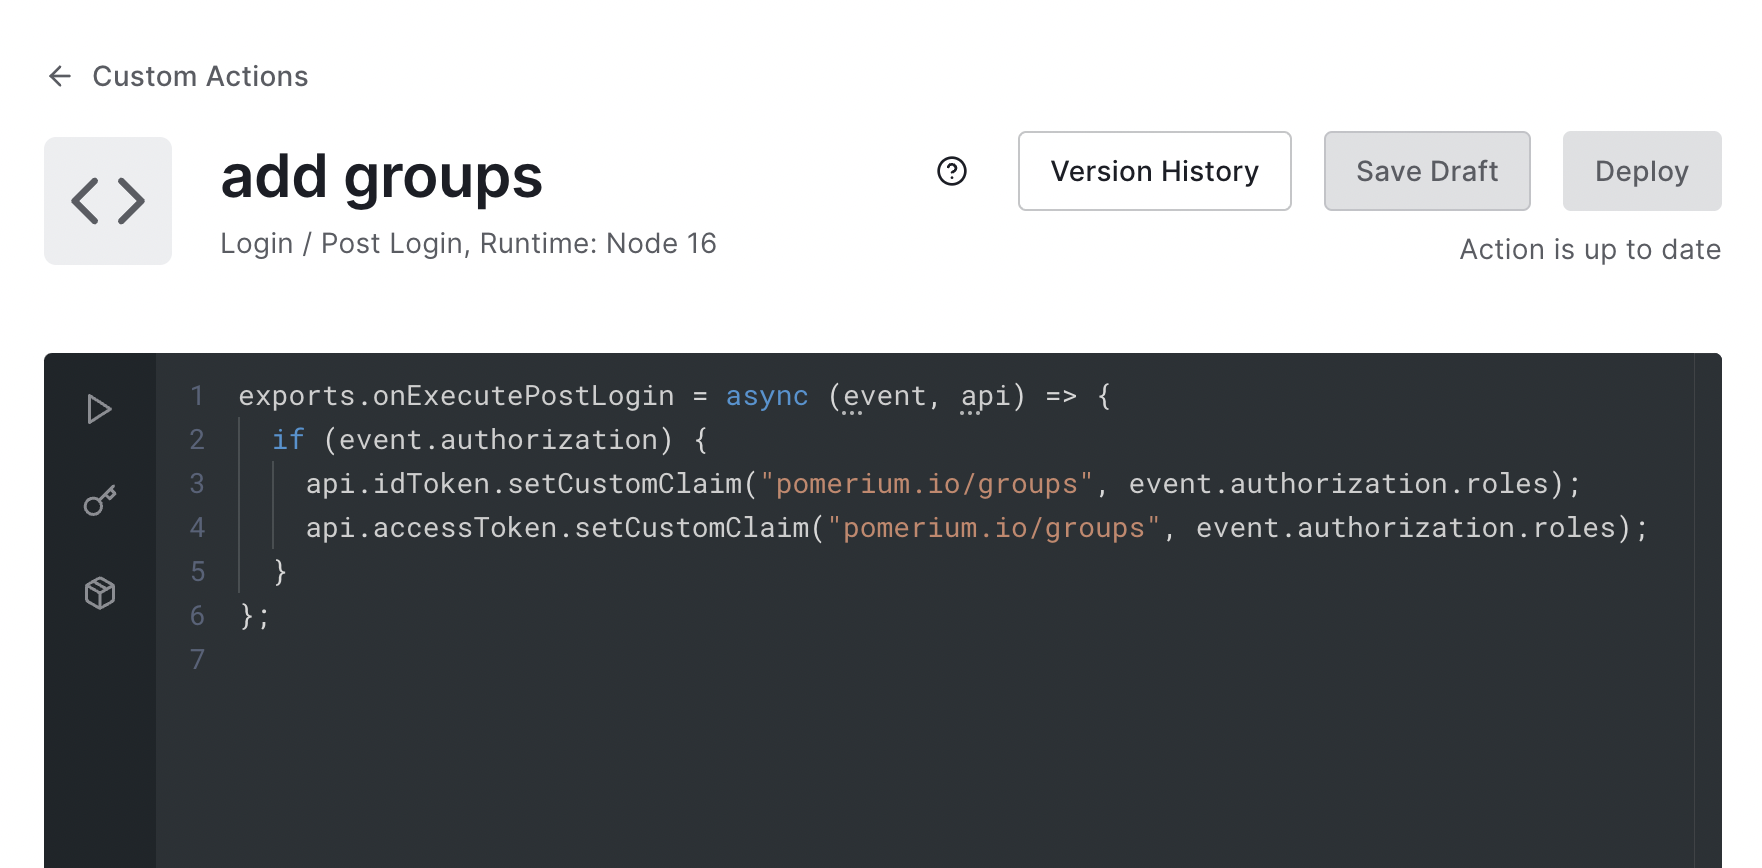
Create an action named
add groupswith the following code:exports.onExecutePostLogin = async (event, api) => {
if (event.authorization) {
api.idToken.setCustomClaim(
'pomerium.io/groups',
event.authorization.roles,
);
}
}; -
Deploy the action:
-
Add it to the login flow:
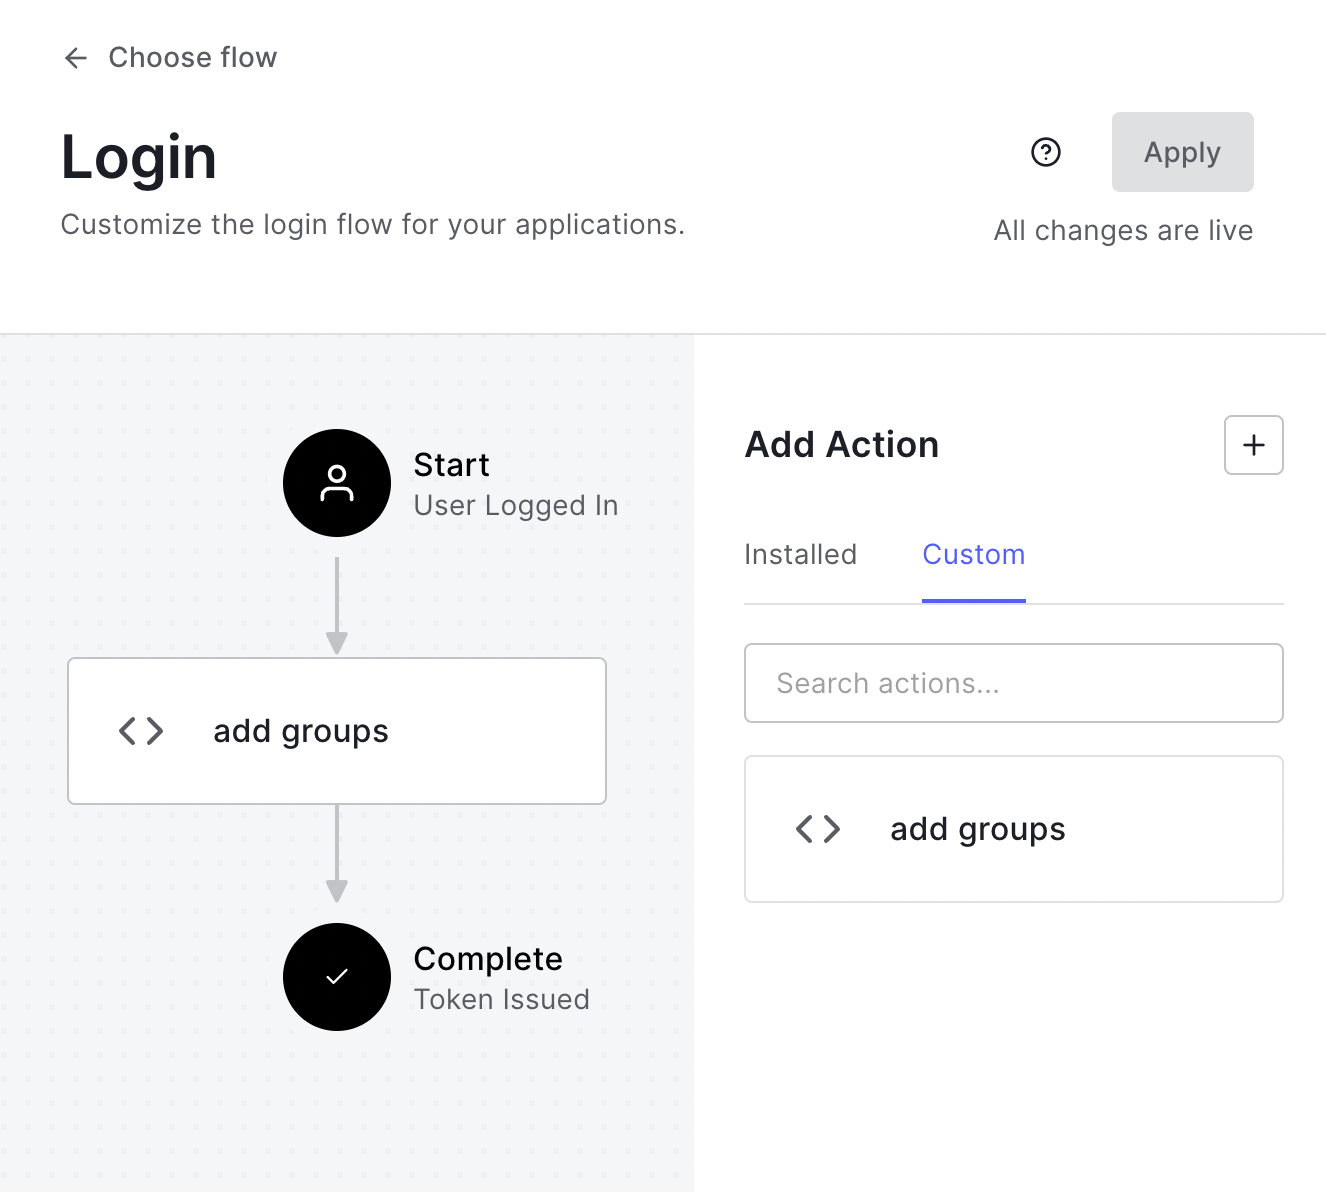
Now when users login they will have a claim named pomerium.io/groups that contains their groups (Auth0 roles) and the claim PPL criterion can be used for authorization:
routes:
  - from: 'https://verify.localhost.pomerium.io'
    to: 'https://verify.pomerium.com'
    policy:
      - allow:
          and:
            - claim/pomerium.io/groups: admin
Setting Up Directory Sync
-
Create a Machine to Machine Application. A different application is used for grabbing roles to keep things more secure.
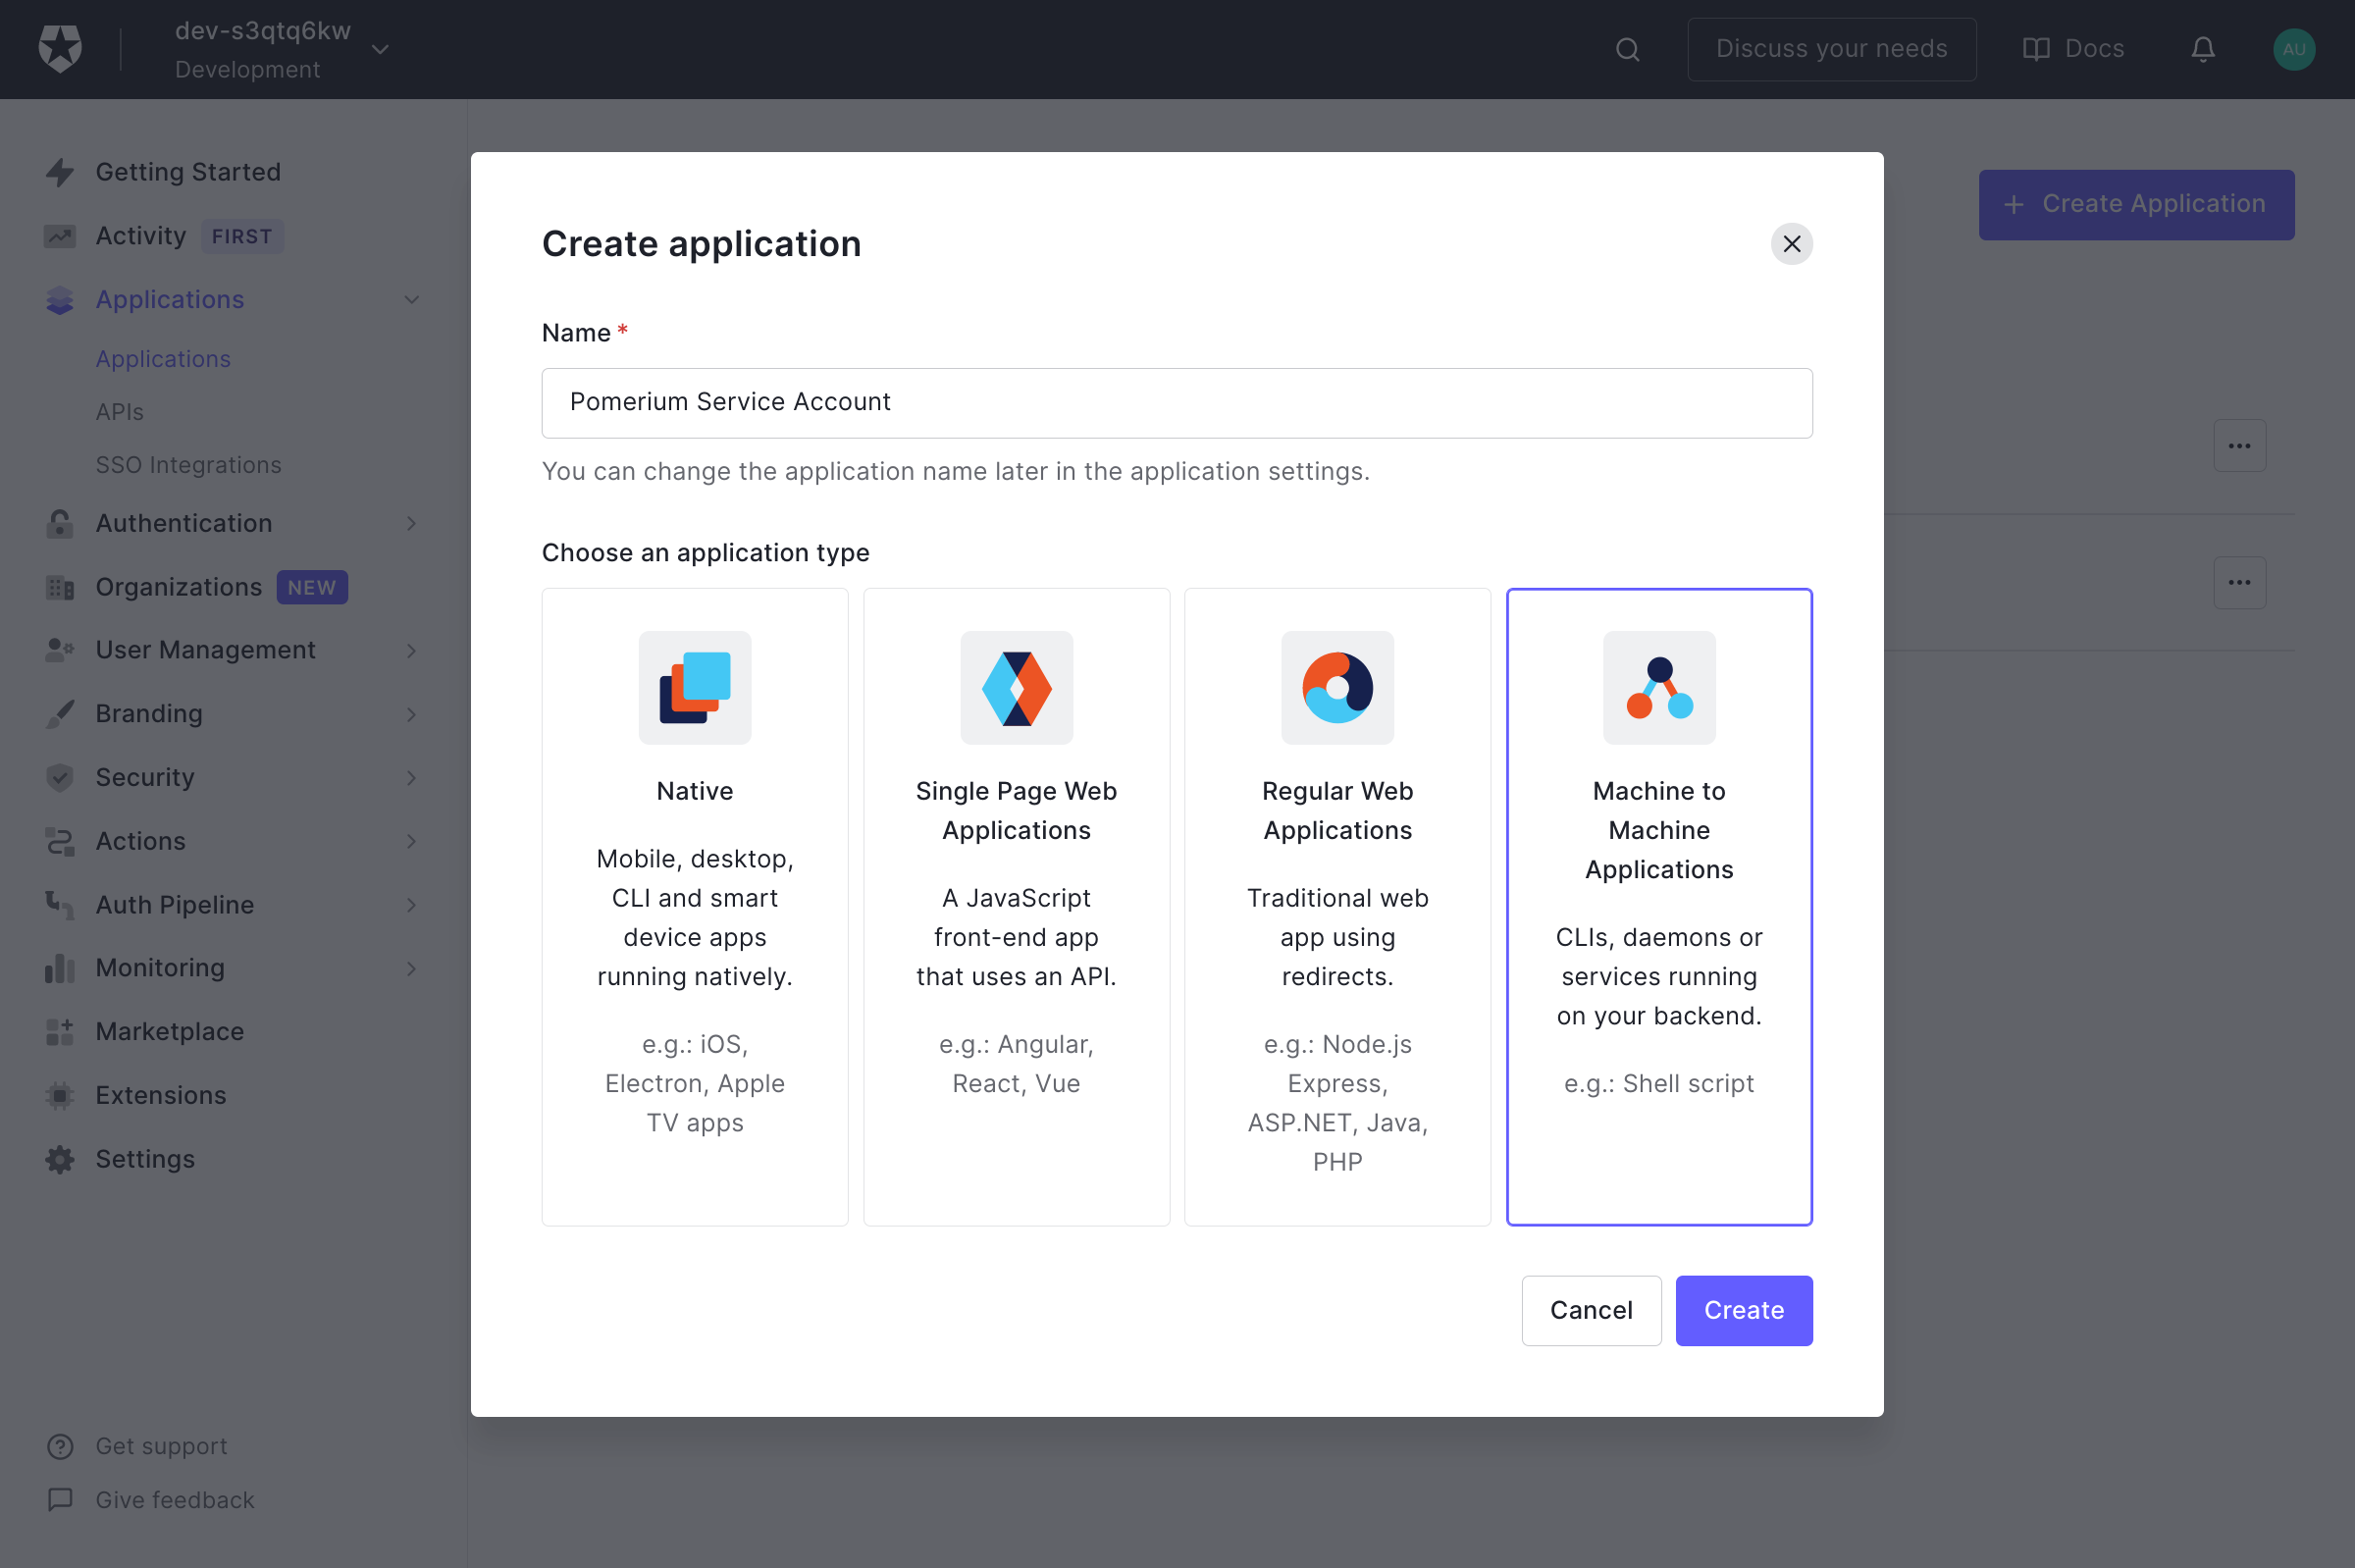
Click Create.
-
On the next page select Auth0 Management API from the dropdown. Under Permissions use the filter on the right to narrow things down to
role, and choose theread:roles,read:role_members,read:users, andread:user_idp_tokensroles.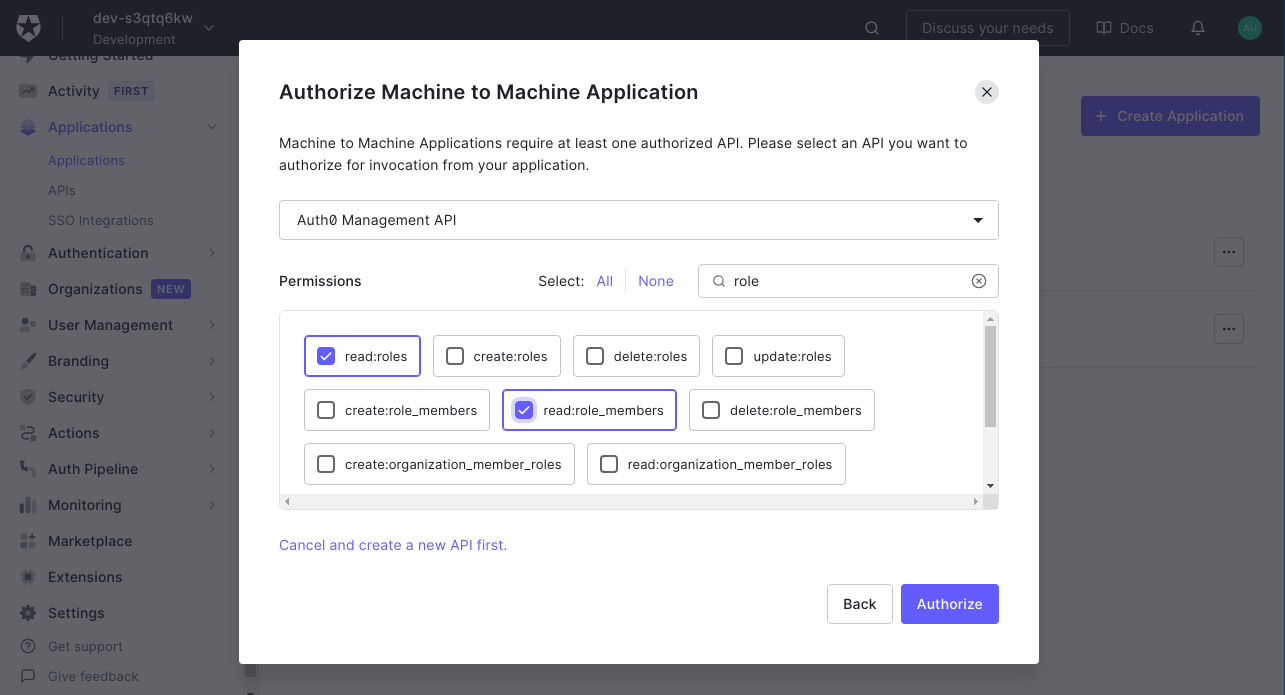
Then click Authorize.
-
Retrieve the Client ID and Client Secret from the Settings tab.
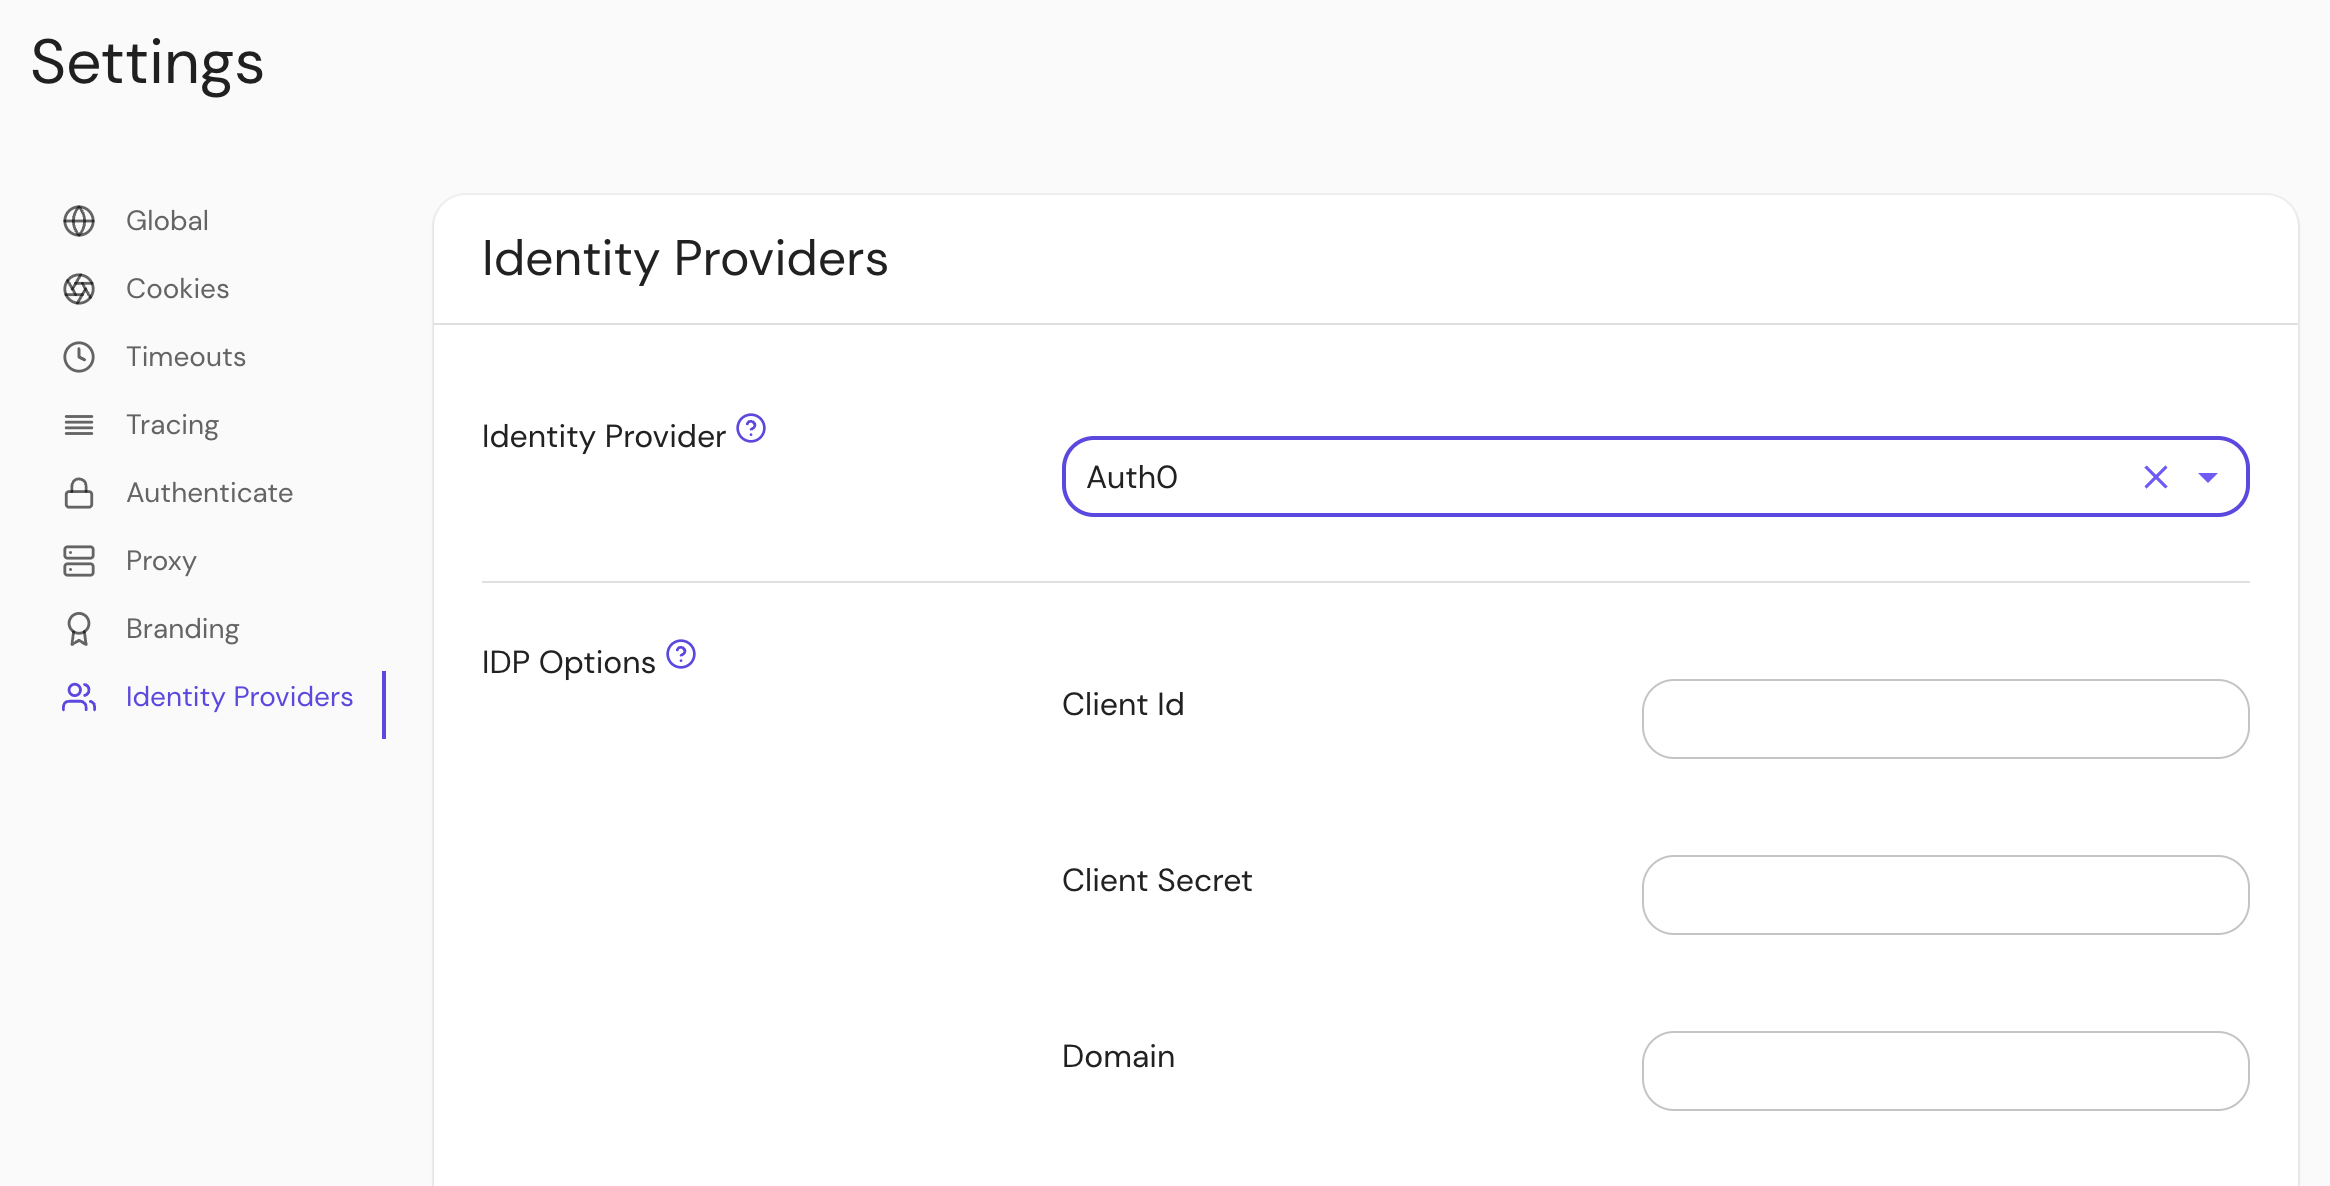
Configure Pomerium Enterprise Console
Under Settings → Identity Providers, select "Auth0" as the identity provider and set the Client ID, Client Secret and Domain.