Pomerium Quickstart
Get started with Pomerium using either our cloud-hosted Zero solution or self-hosted Core.
- Pomerium Zero
- Pomerium Core
Pomerium Zero is our cloud-hosted solution that simplifies deployment and management.
Before you start
- Install Docker and Docker Compose
- Create a (free) Pomerium Zero account
Get Pomerium Zero configuration
After you create an account, you'll be directed to the Zero onboarding screen. In the onboarding screen, select the Docker tab and copy the Docker Compose configuration.
If you are using Pomerium Zero for the first time, but have an existing Pomerium Core configuration, you can import it into Pomerium Zero by following the prompts in the Zero onboarding flow.
See Import Core Config to Zero for more information.
(If you selected Finish before copying the Docker configuration, we've provided a copy below.)
Paste the configuration in a compose.yaml file:
services:
  pomerium:
    image: pomerium/pomerium:latest
    ports:
      - 443:443
    restart: always
    environment:
      POMERIUM_ZERO_TOKEN: <CLUSTER_TOKEN>
      XDG_CACHE_HOME: /var/cache
    volumes:
      - pomerium-cache:/var/cache
    networks:
      main:
        aliases:
          - verify.<CLUSTER_STARTER_SUBDOMAIN>.pomerium.app
  verify:
    image: pomerium/verify:latest
    networks:
      main:
        aliases:
          - verify

networks:
  main: {}

volumes:
  pomerium-cache:
Replace the following values:
- Line 8: Replace
CLUSTER_TOKENwith the cluster token generated for you in the onboarding config - Line 15: Replace
CLUSTER_STARTER_SUBDOMAINwith your generated starter subdomain
You can find your Starter Domain at the top of the Zero Console navigation bar:

Connect to Pomerium Zero
Next, deploy Pomerium with the following command:
docker compose up -d
Pomerium will deploy and run in a special "Zero-managed" mode. In Zero-managed mode, Pomerium connects to the Pomerium Zero cloud service, a remote control plane where you can manage your deployments and configuration.
If your Pomerium deployment connects to the cloud successfully, Pomerium Zero will notify you in the onboarding screen:

Once you've connected, select Finish. You'll be directed to the Zero Console.
If you can't connect to Pomerium Zero, check out these pages for help:
Connect to upstream services
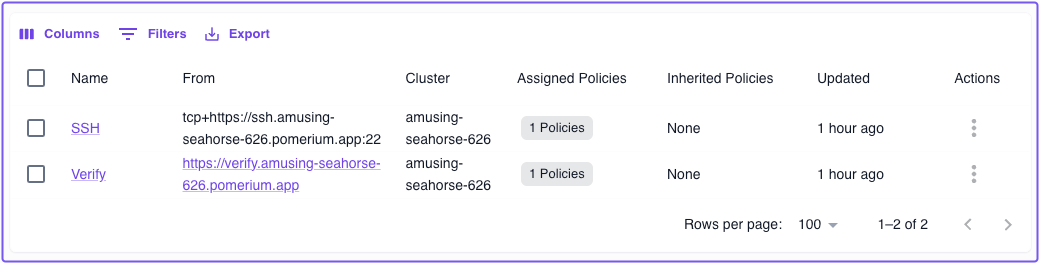
In the Zero Console, we've provisioned two starter routes, SSH and Verify, that come with their own DNS records and TLS certificates:
Connect to Verify
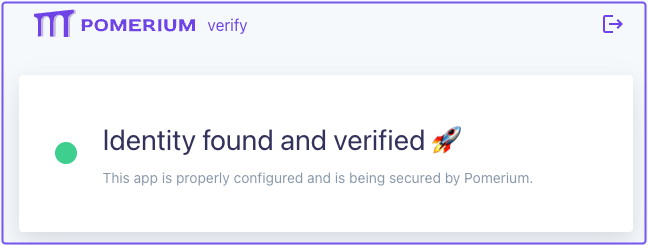
The first service you'll access is the Verify app. This hosted demo app is designed to verify a user's identity, but it also serves as a way to validate that Pomerium is up and running as expected.
In the Zero Console, select the From URL for the Verify app.
You should land on the Verify page:
Check out Pomerium Fundamentals: Build Routes to learn how to create a route to your own service behind Pomerium.
Connect to SSH
The demo SSH route connects to a remote server that you can use to test SSH connections in Pomerium Zero. This example uses tunneled SSH. For production deployments, consider Native SSH Access which provides OAuth authentication with ephemeral certificates.
You need the Pomerium CLI client to connect to services like SSH over a TCP connection. See the Pomerium CLI page for installation instructions.
In a terminal, enter the following command and replace CLUSTER_STARTER_DOMAIN with your own:
pomerium-cli tcp ssh.<CLUSTER_STARTER_DOMAIN>.app:22
Initiate the SSH connection:
ssh ssh-demo.pomerium.com -p 22
A successful request results in a response similar to the one below:
Warning: Permanently added 'ssh-demo.pomerium.com' (ED25519) to the list of known hosts.
This is an SSH honeypot. Everything is logged and monitored.
Review starter policy and certificates
Select the Policies tab. In the policies table, you'll notice a default policy that only grants access if the user's email matches the one associated with your Pomerium Zero account:
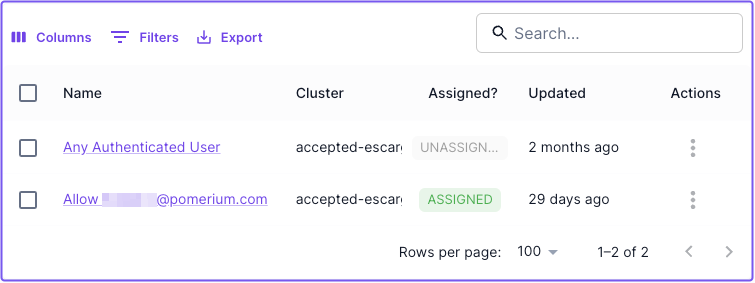
This Starter Policy is assigned to both of the demo routes. You can remove this policy and create your own at any time.
- Go to the PPL page to learn about Pomerium Policy Language
- Go to Build Policies to learn how to create and assign policies using the Zero PPL builder
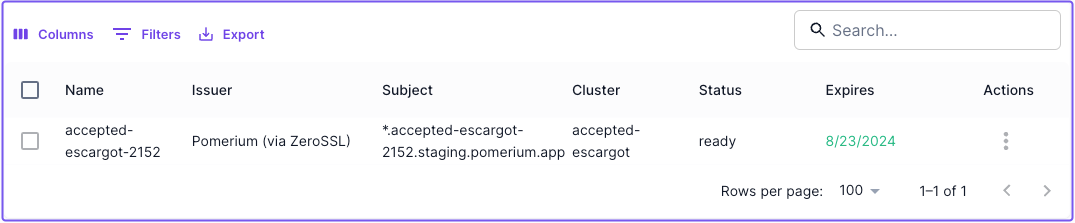
Pomerium automatically provisions and manages TLS certificates issued by ZeroSSL to secure the starter routes in your cluster, and any routes you may build that use your cluster's starter domain.
To see certificates in your cluster, go to the Certificates tab:
Next Steps
Pomerium Core is our open-source, self-hosted identity-aware reverse proxy.
With Pomerium Core, you're assembling the pieces yourself. This quickstart assumes you have a publicly accessible domain with DNS you control.
If you don't have those prerequisites ready, Pomerium Zero provides a managed experience with automatic certificates and DNS. You can always migrate to self-hosted Core later.
Before you start
- A publicly accessible server with ports 443 and 80 available
- A domain with DNS pointing to your server (e.g.,
*.pomerium.yourdomain.com) - Docker and Docker Compose installed
This quickstart uses Docker, but Pomerium Core also supports binaries, OS packages, and building from source.
Set up your project
Create a new directory for your Pomerium setup:
mkdir pomerium_quickstart
cd pomerium_quickstart
Your project will contain:
config.yaml- Pomerium configurationdocker-compose.yaml- Docker services configuration
Configure Pomerium Core
Create a config.yaml file with your Pomerium configuration:
# Pomerium will automatically obtain certificates from Let's Encrypt
autocert: true

# Routes
routes:
  - from: https://verify.pomerium.yourdomain.com
    to: http://verify:8000
    pass_identity_headers: true
    policy:
      - allow:
          or:
            - email:
                is: user@example.com
Replace:
yourdomain.comwith your domainuser@example.comwith your email address
Create Docker Compose configuration
Create a docker-compose.yaml file:
services:
  pomerium:
    image: pomerium/pomerium:latest
    volumes:
      - ./config.yaml:/pomerium/config.yaml:ro
      - pomerium-cache:/data/
    ports:
      - '443:443'
      - '80:80'

  verify:
    image: pomerium/verify:latest

volumes:
  pomerium-cache:
The pomerium-cache volume will store Let's Encrypt certificates so they persist across container restarts.
Deploy Pomerium Core
Start your Pomerium deployment:
docker compose up -d
Test your setup
- Navigate to
https://verify.pomerium.yourdomain.com(using your actual domain). - You'll be prompted to sign in with the Pomerium hosted authenticate service.
- After authentication, you should see the Pomerium Verify page displaying your identity details.
Session persistence
If you stop and restart the Pomerium container at this point, the next time you access the Pomerium route you may be prompted to sign in again. To avoid this, you'll need to configure Pomerium with a fixed shared secret and a persistent storage backend.
To generate a new shared secret you can run this command:
head -c32 /dev/urandom | base64
Then add these lines to your config.yaml file:
shared_secret: REPLACE_WITH_GENERATED_SECRET

databroker_storage_type: file
databroker_storage_connection_string: file:///data/pomerium

# Pomerium will automatically obtain certificates from Let's Encrypt
autocert: true

# Routes
routes:
  - from: https://verify.pomerium.yourdomain.com
    to: http://verify:8000
    pass_identity_headers: true
    policy:
      - allow:
          or:
            - email:
                is: user@example.com