Build a Simple Route
In this tutorial, you’ll learn about Routing in Pomerium. By the end, you’ll add a new service to Docker Compose and define a route to it.
Make sure you’ve completed the Get Started tutorial.
If you already did, you should have:
- A Pomerium configuration file
- A Docker Compose configuration file
You’ll build on these configuration files in each tutorial.
Routing in Pomerium
In Pomerium, Routing tells the Proxy service where to listen for incoming requests from the client and where to direct the origin server’s responses to the client.
Put simply, routing makes it possible for Pomerium to manage requests and responses between the client and the upstream app.
Continuing our waiter-kitchen analogy, routing is when the client tells Pomerium, “Get me butter cookies. Topped with meringue, tastefully burnt.” and Pomerium forwards that to the kitchen, telling them, “Burnt meringue-topped butter cookies, table 5.” The client gets what they want without entering the kitchen, the kitchen knows what and where to send it, everyone’s happy.
How routing works in Pomerium
Each Pomerium route consists of a From and To field:
- The From field defines the external, publicly accessible URL of a proxied request. It tells the Proxy service to listen for requests from this location.
- The To field defines the destination of the proxied request, and can be an internal or external resource
When someone sends a request to access an upstream service, they are accessing the From URL. Pomerium receives the request and redirects the origin server’s response to its destination – the value of the To URL.
Define a route in Pomerium
Now that you know how Routes work, let’s define one in your Pomerium configuration file. We will build a route to Grafana, an open-source analytics and monitoring tool.
Under the routes: key in your Pomerium configuration file, add the following route:
authenticate_service_url: https://authenticate.pomerium.app

routes:
  - from: https://verify.localhost.pomerium.io
    to: http://verify:8000
    policy:
      - allow:
          or:
            - email:
                is: user@example.com
    pass_identity_headers: true
# Add Grafana route here:
	- from: https://grafana.localhost.pomerium.io
	  to: http://grafana:3000
	  allow_any_authenticated_user: true
In your docker-compose.yaml file, add Grafana as a service:
services:
  pomerium:
    image: cr.pomerium.com/pomerium/pomerium:latest
    volumes:
      - ./config.yaml:/pomerium/config.yaml:ro
    ports:
      - 443:443
  verify:
    image: cr.pomerium.com/pomerium/verify:latest
    expose:
      - 8000
  grafana:
    image: grafana/grafana:latest
    ports:
      - 3000:3000
Understanding your route
Now, go back to your Pomerium configuration file. Let’s quickly discuss your new Grafana route:
The from field contains our Fully Qualified Domain Name (FQDN):
grafana.localhost.pomerium.io
If we break apart the FQDN, grafana is the hostname.
Because we’re using Docker Compose, the hostname references the name of the service as defined in your docker-compose.yaml file:
services:
  grafana:
    image: grafana/grafana:latest
    ports:
    - 3000:3000
The localhost part is a subdomain, and pomerium.io is the domain name.
We’ve hardcoded localhost.pomerium.io to always point to 127.0.0.1 so you can use it locally in your development environment.
The to field tells the Proxy service where to send the origin server’s response (in this case, the origin server would be Grafana).
In our example, Pomerium will send responses to grafana:3000.
Again, this is because we’re using Docker Compose to power our services. grafana is the name of the service, and we’re exposing our host machine’s port :3000 and mapping it to port :3000 in the Grafana container.
Within our Docker environment, Pomerium knows exactly where to send the response to.
Access your new route
Now that you understand more about routing, run your containers:
docker compose up
And access your route: https://grafana.localhost.pomerium.io
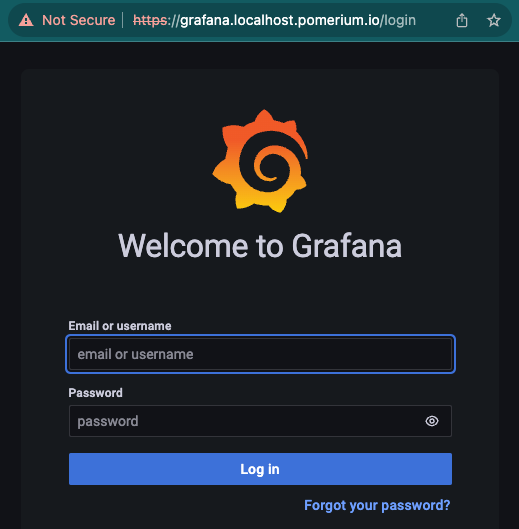
If you reach this after the authentication step, you’ve succeeded in setting up a route to Grafana!
Awesome!
In this tutorial, we won’t configure Grafana any further. But, if you’re curious how to set it up in a local testing environment, see our Grafana guide.
Summary
In this tutorial, you:
- Learned about routing in Pomerium
- Secured a new service behind Pomerium
- Built a route to access the new service
This is more or less the service part of a reverse proxy, but after you build a road you need to secure it.
Right now, the security is pretty lax; if you can authenticate, you’re in. So, it’s time to build an authorization policy that won’t just let anyone in except for the right people.
Next up: Build a Simple Policy
Configuration file state
By now, your configuration files should look similar to this:
authenticate_service_url: https://authenticate.pomerium.app

routes:
  - from: https://verify.localhost.pomerium.io
    to: http://verify:8000
    policy:
      - allow:
          or:
            - email:
                is: user@example.com
    pass_identity_headers: true
  - from: https://grafana.localhost.pomerium.io
    to: http://grafana:3000
    allow_any_authenticated_user: true
Docker Compose:
services:
  pomerium:
    image: cr.pomerium.com/pomerium/pomerium:latest
    volumes:
      - ./config.yaml:/pomerium/config.yaml:ro
    ports:
      - 443:443
  verify:
    image: cr.pomerium.com/pomerium/verify:latest
    expose:
      - 8000
  grafana:
    image: grafana/grafana:latest
    ports:
      - 3000:3000